Blog
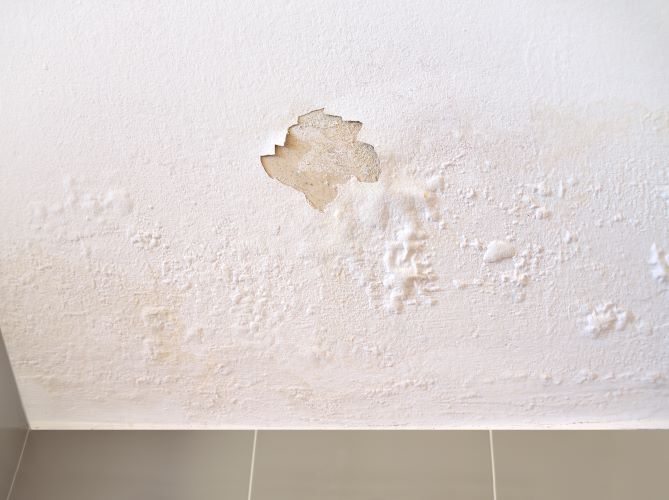
Water damage is one of the most common issues homeowners face, particularly in areas like London, Ontario, where weather conditions can be unpredictable. Whether caused by a burst pipe, leaky roof, or flooding, water damage can have a devastating effect on drywall and ceiling integrity. Understanding the impact and addressing it promptly can save your home from long-term structural issues and costly repairs. How Water Affects Drywall and Ceilings 1. Loss of Structural Integrity Drywall is a porous material, making it highly susceptible to water absorption. Once soaked, it becomes soft and loses its structural integrity, leading to sagging, warping, or even collapse. Similarly, ceilings can bow or crack under the added weight of trapped moisture. 2. Mold and Mildew Growth Moist drywall creates an ideal environment for mold and mildew to thrive. Not only does this damage the material further, but it also poses serious health risks, including allergies and respiratory issues. 3. Stains and Discoloration Water damage often leaves unsightly stains or yellowish-brown discoloration on drywall and ceilings. While these may seem like mere cosmetic issues, they are often indicators of deeper damage. 4. Compromised Insulation In many cases, drywall damage also affects the insulation behind it. Wet insulation loses its effectiveness, leading to increased energy bills and reduced indoor comfort. Signs of Water Damage in Drywall and Ceilings Sagging or Bulging : Walls or ceilings that appear uneven or bowed are likely retaining moisture. Cracking or Peeling Paint : Waterlogged drywall can cause paint to bubble, crack, or peel. Persistent Damp Odors : A musty smell often indicates hidden water damage. Visible Stains : Brownish marks on walls or ceilings are a clear sign of water infiltration. Soft or Spongy Texture : Pressing on affected areas may reveal weakened, soft drywall. Why Timely Repairs Are Crucial Delaying repairs can exacerbate the problem and lead to: Escalating Repair Costs : Minor issues can turn into major renovations if not addressed promptly. Health Hazards : Mold growth can spread rapidly, affecting indoor air quality and health. Structural Damage : Prolonged water exposure can compromise the framework behind your walls and ceilings. Steps to Repair Water-Damaged Drywall and Ceilings 1. Assess the Damage Inspect the affected areas to determine the extent of the water damage. Look for stains, soft spots, and signs of mold growth. 2. Address the Source Before repairing the drywall or ceiling, fix the underlying issue causing the water damage. This could be a leaky roof, faulty plumbing, or poor drainage. 3. Remove Damaged Materials Cut out and dispose of irreparably damaged sections of drywall and insulation. This step helps prevent mold and ensures a clean base for new materials. 4. Dry the Area Thoroughly dry the exposed areas using fans, dehumidifiers, or professional drying equipment to prevent further moisture issues. 5. Replace and Restore Install new drywall or ceiling panels, ensuring they are securely attached. Tape and mud the seams, sand the surface smooth, and finish with a fresh coat of paint. How London Drywallers Can Help At London Drywallers , we specialize in repairing water-damaged drywall and ceilings. Our team of experts provides: Comprehensive Assessments : We identify the root cause of water damage to prevent recurrence. Efficient Repairs : From minor patches to complete replacements, we restore your walls and ceilings to their original condition. Mold Prevention : We ensure the affected areas are thoroughly dried and treated to avoid mold growth. Seamless Finishes : Our work blends perfectly with your existing décor, leaving no trace of damage. Preventing Future Water Damage While it’s impossible to control all external factors, you can reduce the risk of water damage with these preventive measures: Regular Maintenance : Inspect your roof, plumbing, and gutters for potential issues. Proper Ventilation : Use exhaust fans and dehumidifiers in moisture-prone areas like bathrooms and basements. Upgrade Materials : Consider moisture-resistant drywall in areas vulnerable to water exposure. Quick Action : Address leaks or water intrusion immediately to minimize damage. Conclusion Water damage to drywall and ceilings is more than an aesthetic issue—it can compromise the safety and integrity of your home. By recognizing the signs early and seeking professional repair services, you can protect your property from further harm. If you’re dealing with water damage in London, Ontario, trust London Drywallers to restore your home quickly and effectively. Contact us today for a consultation and let us help safeguard your space!
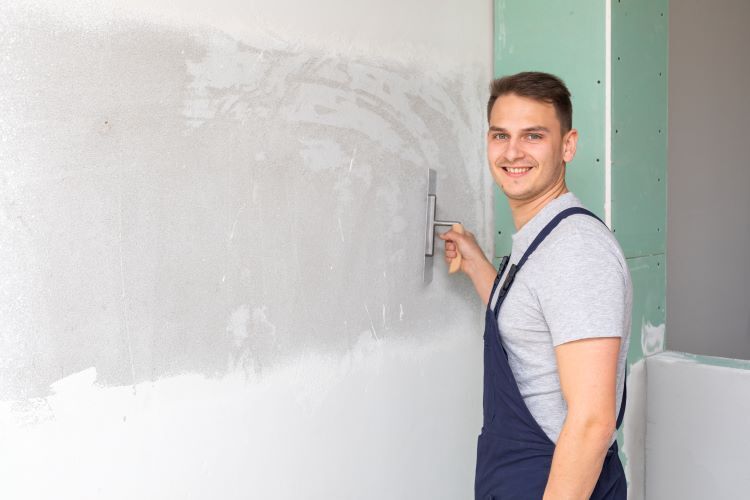
When it comes to achieving a flawless drywall finish , one of the most critical steps is applying the right number of coats of joint compound, commonly referred to as "mud." At London Drywallers , serving homeowners and businesses in London, Ontario, we often receive questions about how many coats of mud are necessary for that smooth, professional look. Here's a comprehensive guide to help you understand the process and why each coat matters. What Is Drywall Mud, and Why Is It Important? Drywall mud is a compound used to seal seams between drywall sheets, cover screw holes, and create a smooth, uniform surface ready for painting or texturing. A proper application process ensures durability and a seamless appearance, making it an essential part of any drywall installation or repair project. The Step-by-Step Process of Applying Drywall Mud Typically, achieving a perfect drywall finish requires three coats of mud and sometimes a fourth for extra polish. Here's why each coat matters: 1. The First Coat: Filling Seams and Screw Holes Purpose: The first coat serves as the foundation, filling gaps between drywall sheets and covering screw heads. Tools Needed: Use paper or mesh tape to reinforce seams before applying the mud with a taping knife. Technique: Apply a thin layer of mud over the tape and screw holes, ensuring all areas are covered. Smooth out excess mud to reduce sanding later. 2. The Second Coat: Building and Smoothing Purpose: The second coat is meant to even out the surface, covering the tape completely and smoothing any ridges from the first coat. Technique: Apply a wider layer of mud, feathering the edges to blend into the surrounding drywall. This coat should be slightly thicker than the first but still smooth. Drying Time: Allow the first coat to dry completely before applying the second to prevent cracking or peeling. 3. The Third Coat: Final Smoothing Purpose: The third coat is the finishing touch, ensuring a seamless, smooth surface. Technique: Use a wider knife (10-12 inches) to spread a thin, even layer of mud. Focus on blending edges to eliminate visible lines or bumps. Optional Fourth Coat: For high-visibility areas, such as living rooms or kitchens, applying a fourth coat can enhance the finish. This coat is particularly helpful for achieving a polished, professional appearance. Tips for Achieving a Perfect Finish Allow Ample Drying Time: Each coat of mud needs to dry completely before sanding or applying the next coat. Depending on the humidity and temperature in your space, drying can take 12-24 hours. Sand Between Coats: Lightly sand each coat with fine-grit sandpaper to smooth out imperfections. Avoid over-sanding, which can damage the drywall tape. Use Quality Tools: Invest in high-quality taping knives and mud pans for a more precise application. Mix Mud Properly: If you're using powdered joint compound, mix it thoroughly to avoid lumps. Pre-mixed compounds are also a great option for beginners. Practice Patience: Rushing the process can lead to uneven coats or cracks. Take your time to ensure each layer is applied and smoothed correctly. Common Mistakes to Avoid Applying Too Much Mud at Once: This can cause cracking and requires more sanding. Skipping Drying Time: Incomplete drying between coats can result in peeling or poor adhesion. Ignoring Edges: Feathering edges properly is crucial for blending the mud into the surrounding drywall. Conclusion Perfect drywall requires patience, technique, and the right number of coats of mud. Whether you're tackling a DIY project or hiring professionals, understanding the process ensures a seamless, polished result. At London Drywallers , we specialize in drywall installation , repair , and finishing. Our experienced team ensures every coat is applied with precision for flawless results. Contact us today for expert drywall services in London, Ontario, and let us bring perfection to your walls!
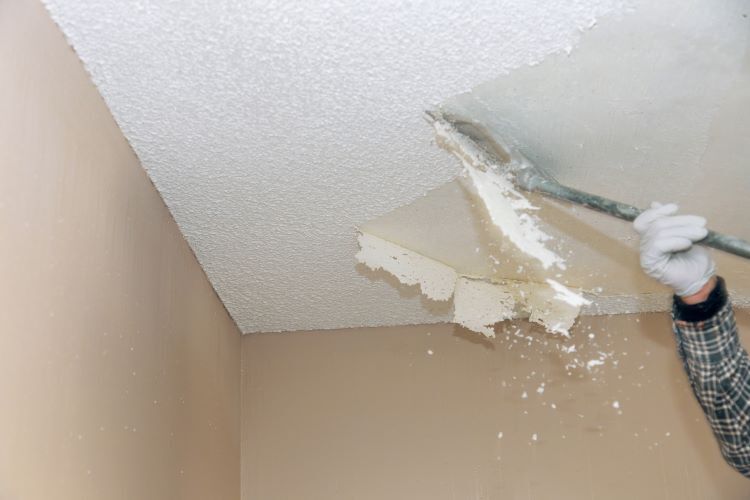
Popcorn ceilings, also known as acoustic or stipple ceilings, were once a popular choice for homes built between the 1950s and 1980s. However, what was once trendy is now considered outdated, leaving many homeowners eager to get rid of this textured finish. Removing popcorn ceilings can dramatically modernize your home, giving it a cleaner, more polished look. If you're in London, Ontario, and looking to update your home, London Drywallers is here to guide you through the process. In this step-by-step guide, we'll walk you through how to safely and efficiently remove popcorn ceilings to transform your space. Why Remove Popcorn Ceilings? Before diving into the removal process, it's essential to understand why many homeowners choose to eliminate popcorn ceilings: Outdated Appearance : Popcorn ceilings can make a space look dated and can be challenging to paint or repair. Dust and Dirt Accumulation : The bumpy texture attracts dust, cobwebs, and grime, making it harder to keep your ceilings clean. Potential Asbestos Risk : Homes built before the 1980s may contain asbestos in the popcorn texture, which poses health risks if disturbed. Increased Home Value : Removing popcorn ceilings can increase the appeal and value of your home, especially if you're planning to sell. Tools and Materials You’ll Need Before you start the popcorn ceiling removal process, gather the following tools and supplies: Safety goggles Dust mask or respirator Drop cloths or plastic sheeting Painter’s tape Spray bottle filled with water Putty knife or drywall scraper Step ladder Joint compound (for patching any damage) Sandpaper (150-220 grit) Ceiling paint and primer (for finishing) Note: If your home was built before 1980, it's crucial to have the ceiling tested for asbestos before proceeding. If asbestos is present, hire a professional removal service. Step 1: Prepare the Room Popcorn ceiling removal can be a messy job, so proper preparation is key to minimizing cleanup afterward. Clear the Room : Remove all furniture, light fixtures, and decor from the room. Cover Surfaces : Use drop cloths or plastic sheeting to cover floors and any remaining items. Secure the edges with painter’s tape to prevent any damage from moisture. Turn Off Power : If you're working near light fixtures, turn off the power at the circuit breaker to avoid any electrical hazards. Step 2: Protect Yourself Safety is paramount when removing popcorn ceilings, especially if you're unsure about asbestos content. Wear Protective Gear : Put on safety goggles, a dust mask or respirator, and gloves to protect yourself from dust and debris. Ventilate the Area : Open windows and doors to allow fresh air to circulate and reduce dust accumulation. Step 3: Spray and Soften the Texture To make the scraping process easier, it's essential to soften the popcorn texture. Fill a Spray Bottle with Water : Lightly mist a section of the ceiling with water. Avoid soaking the area, as excessive moisture can damage the drywall underneath. Wait for a Few Minutes : Allow the water to penetrate and soften the texture for about 10-15 minutes. Pro Tip : Work in small sections (around 4x4 feet) to prevent the ceiling from drying out before you can scrape it off. Step 4: Scrape Off the Popcorn Texture With the ceiling softened, it’s time to start scraping. Use a Putty Knife or Drywall Scraper : Gently scrape off the popcorn texture using a putty knife or scraper. Hold the tool at a slight angle to avoid gouging the drywall. Be Patient : This step can be time-consuming, so take your time to avoid damaging the ceiling. Pro Tip : Use a wide putty knife or drywall scraper for faster results and to cover more surface area. Step 5: Patch and Repair Once you've removed the popcorn texture, inspect the ceiling for any damage. Fill Holes and Cracks : Use joint compound to patch any dents, holes, or imperfections. Sand the Surface : Once the joint compound is dry, sand the ceiling with fine-grit sandpaper (150-220 grit) to achieve a smooth finish. Step 6: Prime and Paint With a clean and smooth ceiling, the final step is to prime and paint. Apply Primer : Start with a coat of primer to ensure better paint adhesion and to seal any remaining stains. Paint the Ceiling : Once the primer is dry, apply two coats of ceiling paint for a fresh, updated look. Pro Tip : Use a paint roller with an extension handle to make the job easier and achieve an even finish. When to Call the Professionals While DIY popcorn ceiling removal can save money, it can also be labor-intensive and time-consuming. Additionally, if you encounter asbestos or lead paint, it's crucial to involve professionals. London Drywallers has the expertise and equipment to handle popcorn ceiling removal safely and efficiently, ensuring a flawless finish. The Benefits of Professional Popcorn Ceiling Removal Hiring a professional team like London Drywallers comes with several advantages: Expertise and Experience : Our team has years of experience removing popcorn ceilings, ensuring a smooth, damage-free process. Safety Compliance : We handle potential hazards like asbestos with proper safety measures. Time and Efficiency : What might take you days to complete, we can finish in a fraction of the time, with less mess. Final Thoughts Removing popcorn ceilings is a great way to modernize your home and improve indoor air quality. While it’s a project many homeowners can tackle themselves, enlisting professional help can save you time, effort, and stress—especially when dealing with older homes. If you're in London, Ontario, and ready to say goodbye to those outdated popcorn ceilings, London Drywallers is here to help. Contact us today for a free consultation and let’s give your ceilings a fresh, modern look!
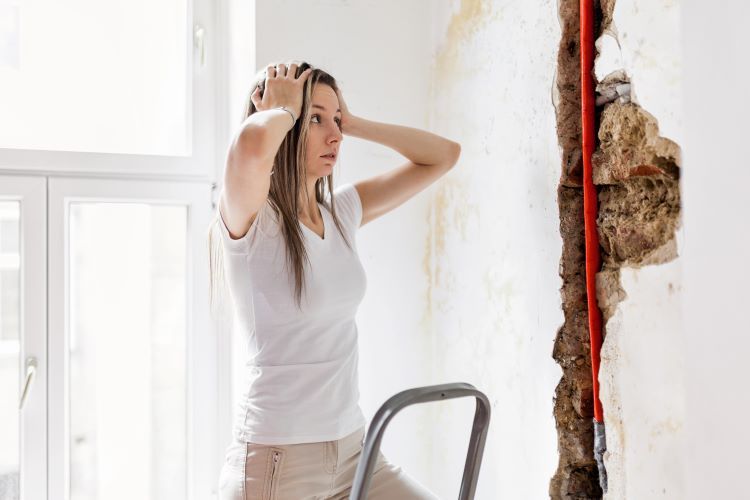
When electrical or plumbing work is done in your home, it often involves cutting into the drywall to access pipes, wires, or other infrastructure behind the walls. While this is necessary for making repairs or upgrades, it leaves holes or damage that need to be properly repaired afterward. The good news is that repairing drywall after electrical or plumbing work is a manageable task, especially when you follow the right steps. At London Drywallers , we specialize in drywall installation and repair , and we're here to guide you through the process of repairing drywall after these kinds of projects. Whether you're tackling the repair yourself or considering professional help, our expert advice will ensure that the finished product looks smooth, seamless, and as good as new. Why Drywall Repair Is Important After Electrical or Plumbing Work While it may seem like a minor issue, repairing the drywall after work is vital for a number of reasons: Aesthetic Appeal: Holes or cuts in your walls detract from the overall look of your space. Repairing them restores the clean, polished look of your home. Energy Efficiency: Gaps in your drywall can let air escape, affecting your home's energy efficiency. Proper repairs help maintain insulation and reduce heating and cooling costs. Structural Integrity: Ensuring that your drywall is properly repaired ensures that there are no weak spots in the wall that could lead to future issues. Tools and Materials You'll Need Before you begin, gather the following tools and materials for the drywall repair: Drywall patch (if the hole is large) Joint compound (spackle or drywall mud) Putty knife or drywall knife Sandpaper or sanding block Primer and paint Drywall saw or utility knife Mesh or paper drywall tape Drywall screws (if needed) Step 1: Assess the Damage The first step is to assess the size and extent of the damage. The repair method you use will depend on whether the hole is small (a few inches in diameter) or large (a section of the wall that’s been cut away). Small Holes (less than 1 inch): For tiny punctures, you’ll typically only need a bit of spackle or joint compound to fill in the gap. Medium to Large Holes (greater than 1 inch): If the hole is larger, you’ll need to cut a drywall patch to fit. This requires a bit more work, but with the right tools, it’s a straightforward process. Step 2: Prepare the Area Before repairing, you need to make sure the area is clean and dry. Remove Loose Debris: Use a utility knife or a drywall saw to remove any loose or jagged edges around the hole. If there are any protruding pieces of drywall or wires, trim them carefully. Check for Wires or Pipes: If you are working around electrical wiring or plumbing pipes, make sure that all the necessary safety precautions are taken. If you’re unsure about how to handle the electrical or plumbing aspects, it’s a good idea to consult a professional. Step 3: Patch the Hole For small holes, a simple application of joint compound or spackle will suffice. For larger holes, you will need to use a patch to cover the damaged area. Small Holes: Use a putty knife to apply joint compound directly into the hole. Smooth it over with the knife, feathering the edges so it blends with the surrounding wall. Let it dry completely, and then sand it smooth. Large Holes: Cut a piece of drywall to fit the hole. It should be slightly smaller than the hole itself so that it fits into place without gaps. Secure the patch by screwing it into place. If necessary, add additional support by attaching wood or metal backing behind the patch. Apply drywall tape around the edges of the patch, then cover the entire patch with joint compound. Smooth the compound evenly with a putty knife, feathering it out at the edges. Allow it to dry. Once the compound is dry, apply additional layers of joint compound as needed. Sand each layer as it dries to create a smooth, level surface. Step 4: Tape and Mud the Seams If your patch requires drywall tape (for larger holes), now is the time to apply it. There are two common types of drywall tape: paper tape and mesh tape. Apply the Tape: Lay the drywall tape over the seams of the patch. If you’re using mesh tape, simply apply it to the edges of the patch. If you're using paper tape, apply a thin layer of joint compound to the seams first, then press the paper tape into the compound. Smooth the Compound: Once the tape is in place, apply a thin layer of joint compound over the tape. Use a drywall knife to smooth it out, feathering the edges so the patch blends seamlessly with the surrounding wall. Let It Dry: Allow the compound to dry completely. You may need to add additional layers, sanding between each layer for a smooth finish. Step 5: Sand and Smooth the Surface Once the compound is dry, it’s time to sand the surface. Use fine-grit sandpaper to smooth out any bumps or ridges. Be sure to sand carefully to avoid damaging the surrounding drywall. The goal is to make the patched area blend in with the rest of the wall. Dust Off the Surface: After sanding, wipe down the area with a damp cloth to remove dust and debris before applying primer or paint. Step 6: Prime and Paint To finish the repair, apply a coat of primer to the patched area. This helps the paint adhere properly and ensures that the repair doesn’t stand out. Prime the Patch: Use a quality drywall primer and apply it over the patched area. Allow it to dry. Paint the Wall: Once the primer has dried, paint over the patch with the same color and finish as the rest of the wall. It may take more than one coat to ensure an even, smooth appearance. Conclusion Repairing drywall after electrical or plumbing work doesn’t have to be a daunting task. With the right tools, materials, and techniques, you can restore your walls to their original condition. Whether you’re dealing with a small hole or a larger patch, the process is simple enough to handle on your own. However, if you prefer professional help, London Drywallers is here to assist with all your drywall repair needs. Our experienced team can make sure the job is done right, ensuring that your home looks as good as new. Need help with your drywall repair? Contact London Drywallers today for expert services and a free estimate!
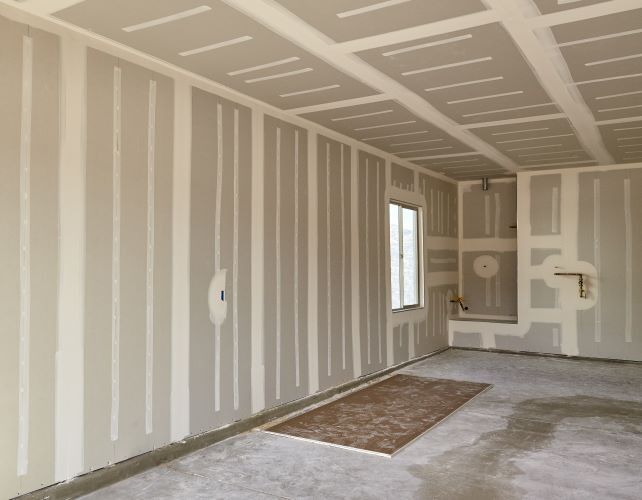
When it comes to installing drywall in high-moisture areas like bathrooms, basements, and kitchens, choosing the right materials and installation techniques can make a significant difference in durability and performance. Moisture can lead to mold, mildew, and structural issues if standard drywall is used without precautions. Here at London Drywallers, we specialize in drywall solutions tailored for London’s climate and specific high-moisture spaces. Here’s a comprehensive guide to achieving optimal results in these challenging environments. 1. Choose the Right Type of Drywall Not all drywall is created equal. High-moisture areas require specific types that resist water and prevent mold growth. Here are some options to consider: Greenboard: Recognizable by its green coating, this drywall type is water-resistant and ideal for moderately moist areas, such as bathrooms or laundry rooms. However, it’s not suitable for areas with constant exposure to water, like shower stalls. Blueboard: Known for its mold and mildew resistance, blueboard is ideal for humid environments and provides an excellent base for veneer plaster. Cement Board: Composed of cement and fiberglass, cement board is extremely durable and water-resistant, making it perfect for areas with direct water contact, like showers or tub surrounds. It’s more challenging to install but provides the best moisture protection. Purple Drywall: This drywall type offers superior moisture and mold resistance, making it a versatile option for various high-moisture environments. 2. Use Mold-Resistant Drywall Products Investing in mold-resistant drywall and joint compound is essential for high-moisture spaces. Mold-resistant drywall contains an anti-microbial coating that inhibits mold growth, keeping your walls safe and healthy. Pairing it with mold-resistant joint compound further enhances protection by creating an impermeable seal in joints and seams where moisture might accumulate. 3. Install Vapor Barriers in Moisture-Prone Areas Adding a vapor barrier is a critical step to prevent moisture from penetrating your drywall installation. A vapor barrier, typically a sheet of plastic or foil, is installed behind the drywall to block moisture from seeping into the walls. This helps prevent mold growth and drywall degradation in areas where moisture levels can vary. In colder climates, such as London’s, placing the vapor barrier on the warm side of insulation is key to preventing condensation buildup behind the drywall. If your installation is in a bathroom, using a paint-on vapor barrier can also offer added protection. 4. Ensure Proper Ventilation Good ventilation is essential to maintaining low moisture levels in high-humidity areas. Make sure the space has sufficient airflow to prevent moisture from becoming trapped within the walls. Install Exhaust Fans: Exhaust fans in bathrooms and laundry rooms help remove excess moisture from the air. Ensure these fans are vented outside, not into the attic or other enclosed spaces, to prevent moisture buildup. Consider Dehumidifiers: For basements and other damp areas, using a dehumidifier helps control humidity levels and minimizes the chances of drywall damage over time. 5. Seal Gaps and Joints Properly Moisture often sneaks in through gaps and seams in drywall installations. Properly sealing these areas is critical for moisture resistance: Use High-Quality Joint Tape and Compound: For high-moisture areas, fiberglass mesh tape works better than paper tape as it’s mold-resistant and creates a more robust bond. Apply Multiple Layers of Joint Compound: To achieve a secure, moisture-resistant seal, apply at least two layers of mold-resistant joint compound, allowing each layer to dry thoroughly before sanding and adding the next. Finish with a Waterproof Sealant: Applying a waterproof sealant over seams and joints adds an extra layer of protection, particularly in areas like bathroom walls and laundry rooms. 6. Prime and Paint with Moisture-Resistant Products To add extra durability, finish your drywall with a moisture-resistant primer and paint: Moisture-Resistant Primer: Using a primer specifically designed for high-moisture environments can prevent water from penetrating through paint and reaching the drywall. Mildew-Resistant Paint: Choose paints labeled for kitchen and bathroom use as these often contain mildew inhibitors, keeping your walls clean and fresh for longer. For an added layer of durability in areas exposed to heavy moisture, consider semi-gloss or satin finishes, as these are more resistant to moisture than flat finishes. 7. Avoid Cutting Corners in High-Moisture Spaces Installing drywall in high-moisture areas demands meticulous attention to detail. Avoid shortcuts like using regular drywall or skipping steps like applying joint compound between layers. High-moisture areas require extra durability, and careful installation ensures that your drywall will withstand the unique challenges posed by these environments. 8. When to Call a Professional High-moisture drywall installation involves technical considerations and often requires specialized tools. If you’re working on a space particularly prone to moisture or have a large-scale project, it’s often best to call a professional. At London Drywallers, we have the experience and materials necessary to handle drywall projects in challenging conditions. From selecting the right materials to completing precise installations, we’re here to ensure that your high-moisture area remains safe and dry for years to come. Conclusion Installing drywall in high-moisture areas demands careful planning and the right materials. By following these professional tips, you can create walls that withstand moisture and maintain their integrity over time. For high-quality drywall installation in London, trust London Drywallers to deliver the expertise and durability your home deserves.
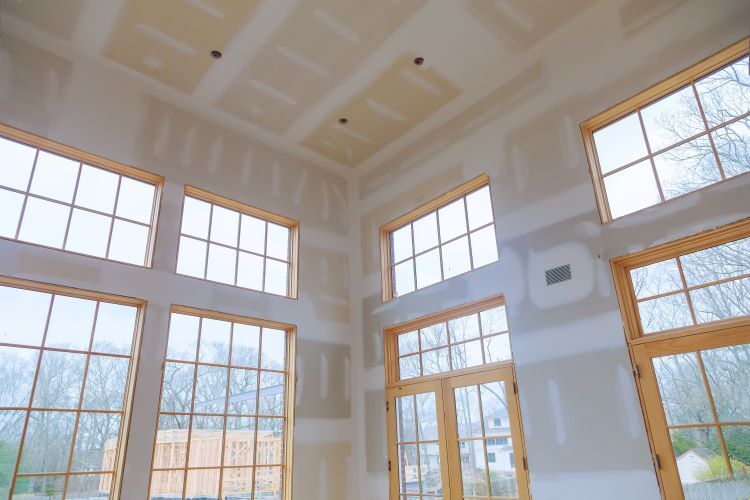
In commercial construction, the choice of materials plays a crucial role in determining the durability and longevity of the structure. Drywall, often overlooked, is one of those essential materials that significantly impacts the overall lifespan and resilience of a commercial building. High-quality drywall not only enhances structural integrity but also offers a host of benefits, from improved insulation to better resistance against fire, moisture, and mold. Here, we’ll explore the impact of drywall quality on commercial building longevity and why investing in premium drywall solutions can benefit building owners and managers in London, Ontario. 1. Enhanced Structural Integrity Quality drywall is designed to provide a strong, stable structure that withstands heavy traffic, frequent wear, and even physical impacts. Commercial buildings typically experience more frequent use and a greater range of environmental challenges compared to residential properties. Using high-quality drywall can: Improve Durability: Premium drywall resists dents, scratches, and everyday impacts, which is essential for high-traffic areas in offices, warehouses, and retail spaces. Reduce Repairs and Maintenance: Lower-quality drywall is more likely to suffer from visible damage over time, leading to costly repairs. Choosing quality materials from the start ensures a longer-lasting finish with fewer interruptions for maintenance. 2. Superior Moisture and Mold Resistance Moisture is a major concern for any commercial building, as it can lead to mold, mildew, and even structural deterioration. Commercial properties with high moisture exposure, like warehouses, kitchens, and health facilities, particularly benefit from drywall options specifically designed to resist moisture. Mold-Resistant Drywall: Mold-resistant drywall typically contains fiberglass instead of paper, which inhibits mold growth and protects walls from moisture-related damage. This is critical in areas like basements, bathrooms, and kitchens. Improved Indoor Air Quality: Mold-resistant drywall not only protects the building but also promotes better indoor air quality, an important factor for spaces with high occupancy like offices, schools, and hospitals. Using moisture-resistant drywall helps ensure that the building remains structurally sound and minimizes health risks associated with mold. 3. Increased Fire Resistance Commercial building codes often require fire-resistant materials to protect property and occupant safety. Fire-resistant drywall is specifically engineered to withstand high temperatures, containing materials such as gypsum, which prevents it from burning as quickly as standard drywall. Protection in High-Risk Areas: Fire-resistant drywall is particularly valuable in commercial spaces that handle flammable materials, such as kitchens or manufacturing facilities. Enhanced Safety Compliance: Using fire-rated drywall helps buildings meet stringent safety standards, potentially lowering insurance premiums and enhancing safety measures for occupants. Choosing fire-rated drywall not only provides a safeguard against potential fires but also extends the longevity of the building by minimizing fire-related damage. 4. Energy Efficiency and Insulation One of the most overlooked benefits of high-quality drywall is its insulating properties. Commercial spaces can be costly to heat and cool, and the right type of drywall can play a role in improving energy efficiency. Thermal Insulation: High-quality drywall helps control indoor temperatures by providing an additional layer of insulation. In cold climates like London, Ontario, this can help reduce heating costs, keeping energy bills lower throughout the year. Soundproofing: For commercial buildings with high noise levels, such as offices, schools, and studios, soundproof drywall offers an added benefit. This type of drywall helps minimize sound transmission, making for a more comfortable work environment and boosting productivity. Improved insulation not only saves on energy costs but also prolongs the lifespan of HVAC systems by reducing the workload needed to maintain optimal indoor temperatures. 5. Aesthetic Longevity In commercial spaces, the appearance of walls matters. High-quality drywall maintains its smooth finish over time, which reduces the need for frequent repairs, repainting, or touch-ups. Less Visible Wear and Tear: High-quality drywall resists damage from scratches, bumps, and daily use, preserving a pristine appearance in lobbies, conference rooms, and retail spaces. Ease of Maintenance: Premium drywall allows for easier cleaning and repainting, making it an excellent choice for areas that require frequent upkeep, like hotels and restaurants. Opting for quality drywall reduces maintenance costs and ensures the space remains inviting and professional-looking for years to come. 6. Long-Term Cost Savings While high-quality drywall may have a higher upfront cost, it often leads to significant savings over the lifespan of the building. Lower-grade drywall tends to require more frequent repairs and replacements, which can disrupt business operations and add up financially. Lower Maintenance Costs: Investing in durable, high-quality drywall reduces the likelihood of needing frequent repairs, saving building owners on maintenance expenses. Reduced Downtime: By minimizing repairs, high-quality drywall reduces downtime, which is essential for businesses that rely on consistent operations. Extended Building Life: Quality drywall contributes to the overall stability and longevity of the structure, helping the building age more gracefully and potentially increasing its value over time. Choosing the Right Drywall for Commercial Projects Selecting the appropriate type of drywall for a commercial project involves considering the unique needs of the space. At London Drywallers, we help businesses choose the best drywall solutions for their specific needs, ensuring maximum longevity and protection. Here’s what to consider: Location of Installation: Determine whether the drywall will be in a high-moisture area, high-traffic area, or a space where soundproofing is necessary. Building Code Requirements: Consult with a drywall professional to ensure the materials comply with local building codes, particularly regarding fire and moisture resistance. Budget and Longevity Goals: Investing in high-quality drywall materials may cost more initially, but the long-term benefits outweigh the cost, especially in demanding commercial environments. Conclusion High-quality drywall is a foundational investment for any commercial building, offering benefits that range from enhanced durability and fire resistance to improved aesthetics and energy efficiency. For businesses in London, Ontario, choosing premium drywall solutions not only ensures compliance with local building codes but also provides long-term value by extending the building’s lifespan and reducing maintenance needs. At London Drywallers , we understand the specific needs of commercial spaces and offer expert guidance on selecting the best drywall options for your building. Whether you're constructing a new space or upgrading an existing one, our team can help ensure your project meets the highest standards of quality and longevity. Contact us today to discuss how we can support your commercial drywall needs with materials that stand the test of time.
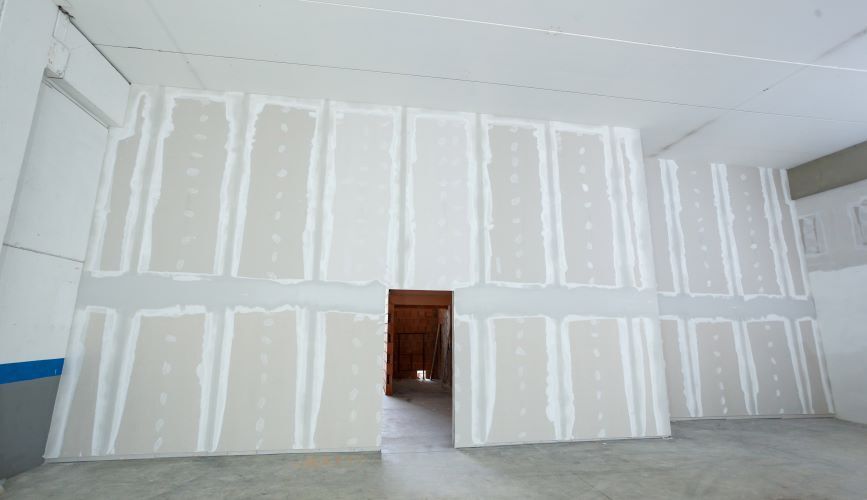
When planning any construction or renovation project, one of the key decisions you’ll need to make is selecting the right drywall thickness. This choice plays a significant role in the overall quality, durability, and functionality of your walls or ceilings. At London Drywallers , we understand that choosing the correct drywall thickness can be confusing, especially with so many options available. In this guide, we’ll walk you through the different thicknesses of drywall and help you determine which one is best suited for your project. 1. Common Drywall Thicknesses Before diving into which thickness is best for your project, it’s important to understand the most common drywall sizes available on the market: 1/4-Inch Drywall: This is the thinnest drywall option and is typically used for specialty projects such as curved walls or as a second layer over existing drywall. 3/8-Inch Drywall: Slightly thicker than the 1/4-inch variety, this drywall is often used for repairing walls or covering old plaster but is not as commonly used in new construction. 1/2-Inch Drywall: This is the most standard thickness used in both residential and commercial construction. It’s versatile and works well for most walls and ceilings. 5/8-Inch Drywall: Thicker and more durable, this type is commonly used for ceilings, soundproofing, and areas requiring additional fire resistance, such as garages or utility rooms. Now that we’ve covered the basic options, let’s explore how to choose the right thickness based on your project’s specific needs. 2. Walls vs. Ceilings: Thickness Considerations Walls For interior walls, 1/2-inch drywall is the standard choice. It’s easy to install, provides sufficient strength, and is typically suitable for most rooms in your home or office. This thickness offers a balance between durability and affordability. However, if you’re installing drywall in high-traffic areas, such as commercial spaces, or in areas where soundproofing is essential, 5/8-inch drywall may be a better option. Its added thickness offers greater sound-dampening properties and increased durability, making it ideal for offices, conference rooms, and shared living spaces. Ceilings For ceilings, you’ll want to opt for drywall that can withstand the forces of gravity without sagging over time. 5/8-inch drywall is typically recommended for ceilings because of its strength and ability to resist sagging, especially in rooms with wide joist spacing. In some cases, if the joist spacing is closer together (such as 16 inches apart), 1/2-inch drywall can be used on ceilings, but the thicker option provides more long-term stability. 3. Fire-Resistant Drywall In certain areas of your home or commercial building, fire resistance is a crucial factor. Fire-rated drywall, also known as Type X drywall, is usually 5/8-inch thick and is designed with additives that slow the spread of flames. This drywall is commonly used in: Garages Utility rooms Shared walls in multi-family buildings Stairwells If you’re working on a project that involves any of these spaces, choosing 5/8-inch fire-rated drywall is essential for meeting safety codes and protecting the property. 4. Soundproofing and Insulation If your project involves soundproofing, whether in a home office, studio, or a multi-unit residential building, thicker drywall will provide better noise reduction. 5/8-inch drywall is the best choice for soundproofing, especially when paired with sound-dampening insulation. Additionally, for exterior walls or basements, you’ll want to combine your drywall with proper insulation to improve the energy efficiency of the building. Thicker drywall can help enhance thermal performance, especially in cold climates like London, Ontario. 5. Curved Walls and Arched Ceilings If you’re designing a space with unique architectural features like curved walls or arched ceilings, 1/4-inch drywall is the best option. Its thin profile allows for easy bending and shaping around curves, making it ideal for decorative finishes and non-standard designs. However, due to its thinness, it’s not recommended for standard wall construction, and it is typically installed over existing drywall for additional support. 6. Repairing or Layering Over Existing Walls For renovation projects where you’re repairing or resurfacing existing walls, 3/8-inch drywall can be a practical solution. This slightly thinner option is often used when layering drywall over old plaster walls or covering up imperfections. It’s also useful for repairs in older homes where walls may not align perfectly with modern building standards. Conclusion Choosing the right drywall thickness for your project is essential for ensuring a durable, safe, and aesthetically pleasing result. Whether you're working on interior walls, ceilings, fire-rated areas, or unique design features, selecting the correct drywall thickness will enhance the quality and longevity of your project. At London Drywallers , we specialize in helping homeowners and builders in London, Ontario, make the best drywall choices for their specific needs. Whether you're building from scratch, renovating, or repairing, our team is here to provide expert advice and top-notch installation services. Contact us today to learn more about our drywall services and how we can help bring your project to life!
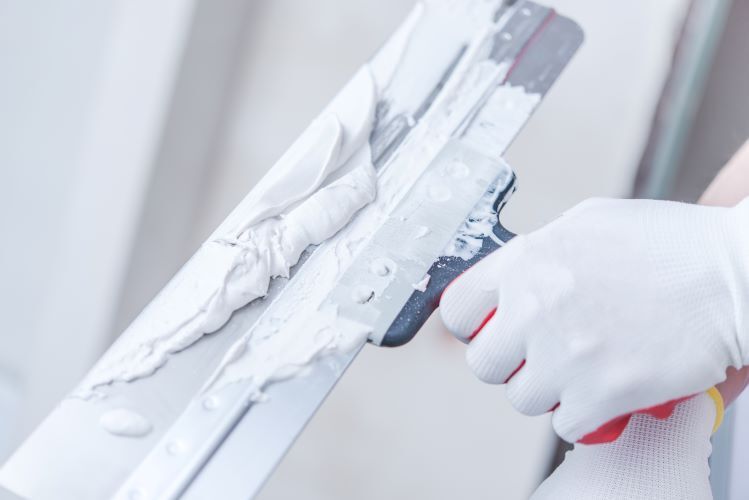
Drywall taping and mudding are essential steps in creating a smooth and seamless finish for your walls and ceilings. Whether you’re working on a renovation, repair, or new construction project, knowing when to apply the second coat of mud is key to achieving professional-quality results. At London Drywallers , we specialize in providing expert drywall services for both residential and commercial projects in London, Ontario. In this article, we’ll walk you through the basics of drywall taping and mudding, focusing on the importance of the second coat and when to apply it for a flawless finish. The Basics of Drywall Taping and Mudding Drywall taping and mudding are processes used to cover the joints between drywall sheets, as well as to hide screws and other fasteners. The goal is to create a smooth, even surface that is ready for painting or other finishing treatments. Here’s a quick overview of the process: Taping: After drywall sheets are installed, a thin layer of joint compound (commonly called mud) is applied over the seams. Drywall tape is then placed over the wet mud to bridge the gap between the sheets and prevent cracks from forming. First Coat of Mud: The first coat of mud is applied over the tape to embed it and create a base layer for subsequent coats. This coat is typically thin and may leave some imperfections, which is normal at this stage. Second Coat of Mud: The second coat is essential for smoothing out any visible lines or imperfections from the first coat. It fills in gaps, feathers the edges, and starts to create that seamless look. Third Coat (if needed): A third and final coat may be applied to perfect the surface and ensure everything is smooth and level. Why the Second Coat Is So Important The first coat of mud serves as a foundation, but it’s the second coat that begins to smooth out the surface and hide imperfections. Without this critical step, you might end up with visible seams, tape lines, or uneven surfaces that will be more apparent after painting. Here’s why the second coat matters: Smooths Seams and Tape Lines: The second coat helps to blend the edges of the tape into the surrounding drywall, making the joint less noticeable. Fills Imperfections: The first coat often leaves some gaps or imperfections, and the second coat fills these areas, giving the surface a more even finish. Prepares for Sanding and Final Finishes: The second coat is the precursor to sanding and any additional coats. It creates a smoother base, reducing the amount of sanding needed and allowing for better adhesion of the final coat. When to Apply the Second Coat Timing is crucial when applying the second coat of drywall mud. If applied too early, the first coat may not be dry enough, leading to issues like cracking or bubbles. Here are the factors to consider: 1. Drying Time of the First Coat Before applying the second coat, you must ensure that the first coat is completely dry. The drying time can vary depending on: Type of Joint Compound: Standard joint compound takes longer to dry, sometimes up to 24 hours. Quick-setting compounds, such as hot mud, can dry in as little as 20 to 90 minutes. Environmental Conditions: Humidity, temperature, and airflow can impact drying times. In a humid environment, drying can take longer, so be patient before moving to the next step. 2. Signs the First Coat Is Ready for the Second Coat You’ll know the first coat is ready for the second coat when: The surface is completely dry to the touch. The mud has turned from a darker, wet color to a lighter, chalky appearance. There are no soft spots when you press lightly on the surface. 3. Feathering the Edges When applying the second coat, it’s important to feather the edges of the mud outward from the seam. Feathering creates a gradual transition between the drywall and the mudded seam, making it easier to achieve a smooth finish. Here’s how to feather effectively: Use a wider drywall knife for the second coat, usually an 8- to 10-inch knife. Apply the mud in thin, even layers, using sweeping motions to spread the compound out from the seam. Avoid creating any ridges or thick layers of mud, as these will require more sanding later. 4. Allow Proper Drying Time Once you’ve applied the second coat, allow it to dry thoroughly before sanding or applying a third coat (if needed). As with the first coat, drying times depend on the joint compound and environmental conditions. For best results, wait until the mud is completely dry before proceeding. Common Mistakes to Avoid During the Second Coat While applying the second coat of mud, there are a few common mistakes that can hinder the quality of your finish. Here’s what to avoid: Applying the Second Coat Too Thick: A thick second coat will take longer to dry and may lead to uneven surfaces. Always aim for a thin, even application. Skipping the Feathering Process: Failing to feather the edges of the mud can result in noticeable ridges or lumps after sanding and painting. Not Sanding Between Coats: Lightly sanding between coats helps create a smoother finish. Use fine-grit sandpaper to knock down any high spots or ridges before applying the next layer of mud. Conclusion The second coat of mud is a crucial step in achieving a smooth and professional-looking drywall finish. By allowing the first coat to dry completely, feathering the edges of the second coat, and applying thin layers, you can create a surface that’s ready for painting or any final touches. At London Drywallers , we have the expertise and attention to detail needed to complete every drywall project with precision and care. Whether you’re remodeling your home, finishing a basement, or completing new construction, our team is here to help with all your drywall needs in London, Ontario. For more information or to get started on your next project, contact London Drywallers today!
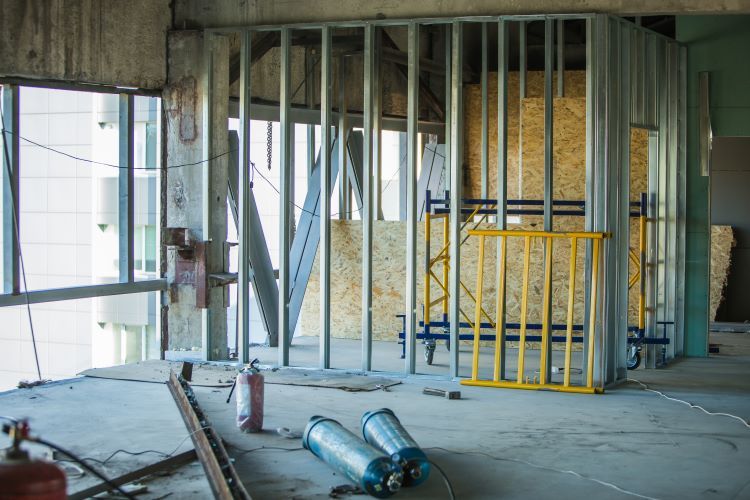
When it comes to building a durable and visually appealing interior, drywall framing is a crucial element in the construction process. Ensuring the drywall fits seamlessly into your space not only enhances the aesthetics but also adds to the overall structural integrity of the walls. One of the most important aspects of drywall framing is accurate measurement. At London Drywallers, we know that precision in framing can make all the difference in the outcome of your project. Let’s explore why accurate measurements are key in drywall framing and how they contribute to a successful project. Why Accurate Measurements Matter in Drywall Framing Structural Integrity Accurate measurements are essential for ensuring the structural soundness of your drywall installation. Poorly framed walls can lead to weak points where drywall sheets do not sit flush against the studs, resulting in cracks, loose panels, or even sagging. Accurate measurements allow for tight, consistent connections between the drywall and the framing, ensuring the strength and durability of the finished walls. Avoiding Material Waste Drywall sheets come in standard sizes, and framing errors can lead to miscuts, meaning more waste and higher costs. By taking the time to measure properly, you can avoid cutting too much off your drywall sheets or leaving gaps that need to be patched up. Accurate framing ensures that the drywall sheets fit perfectly, reducing the need for extra material or repairs down the line. Smooth Drywall Finish Precision in framing directly affects the appearance of your drywall once installed. When measurements are off, drywall sheets may not line up perfectly at the seams, creating uneven joints or noticeable bulges. This can lead to more time spent taping, mudding, and sanding, which delays the project and increases labor costs. Properly measured and framed walls create smoother transitions, making it easier to achieve a professional finish with minimal touch-ups. Electrical and Plumbing Accommodations Accurate drywall framing is essential for incorporating electrical outlets, light fixtures, switches, and plumbing into your walls. If your framing measurements are incorrect, these features may not align properly with the drywall, causing gaps, exposed wires, or even the need for re-framing to accommodate plumbing or wiring changes. Taking precise measurements in the framing stage ensures that everything lines up correctly, so you won’t run into complications later. How to Ensure Accurate Measurements in Drywall Framing Measure Twice, Cut Once This age-old construction rule applies perfectly to drywall framing. Taking the time to measure carefully will help you avoid costly mistakes down the road. Before you cut any materials, double-check your measurements for accuracy. Use the Right Tools Having the right tools is essential for precise measurements. Use a reliable tape measure, a framing square for corners, and a level to ensure the walls are straight and plumb. Laser levels can also be useful for larger projects where long distances need to be measured with precision. Account for Drywall Thickness When framing, it’s important to account for the thickness of the drywall you plan to install. The most common drywall thickness for residential walls is 1/2 inch, but 5/8 inch is often used for ceilings and soundproofing. Knowing the thickness beforehand helps you adjust the framing layout, ensuring that drywall edges align properly with the studs. Proper Spacing of Studs Stud spacing plays a vital role in the strength of the drywall installation. The standard spacing for studs is 16 inches on center, but this can vary depending on the project specifications. Accurate spacing allows for better support of the drywall sheets, minimizing the risk of sagging or movement after installation. Ensure your measurements are consistent along the entire wall to avoid any irregularities. Pay Attention to Openings Doorways, windows, and other openings in the wall require special attention when framing. Precise measurements ensure that drywall can be installed smoothly around these features without the need for excessive cutting or patching. Accurately measured and framed openings also contribute to the overall stability and visual appeal of the finished wall. The Benefits of Professional Drywall Framing While some may attempt DIY drywall framing, hiring professionals ensures that every detail is accounted for, and the project is done to the highest standard. At London Drywallers, we understand the importance of accurate measurements in framing. Our team of experienced drywall professionals ensures that every cut, seam, and joint is perfect, providing a flawless finish that stands the test of time. Key benefits of choosing professional drywall framing include: Reduced Material Waste: Expert measurement techniques ensure you’re not wasting drywall sheets or other materials due to misalignment or miscuts. Quicker Installation: Professionals know how to measure and cut efficiently, speeding up the entire drywall installation process. Long-Lasting Durability: With accurate framing, your drywall is securely fastened, preventing cracks, loose panels, or warping in the future. Flawless Appearance: Professional framing results in smoother drywall surfaces and more even seams, requiring less work during the finishing stages. Conclusion Accurate measurements are the foundation of successful drywall framing. Whether you're building new walls, renovating a space, or installing drywall in your garage, precision is key to ensuring a seamless and durable finish. Properly framed walls not only improve the appearance of your space but also enhance its structural integrity. At London Drywallers, we specialize in drywall framing and installation, providing top-quality craftsmanship for both residential and commercial projects. If you're planning a drywall project and want to ensure the best results, contact us today. Let our experts handle the framing so you can enjoy flawless walls and ceilings for years to come.

When it comes to finishing your garage, choosing the right wall material is key to creating a functional and aesthetically pleasing space. For homeowners in London, Ontario, drywall is one of the best options for garage walls. It offers durability, cost-effectiveness, and versatility, making it the go-to choice for many. In this article, we’ll explore why drywall is the ideal material for your garage walls and how London Drywallers can help you achieve the perfect finish for your space. 1. Durability and Protection Garages are high-traffic areas that often serve as multi-functional spaces. Whether you use your garage as a workshop, storage area, or simply to park your car, the walls need to withstand bumps, scrapes, and potential impact. Drywall provides a durable surface that holds up well under normal wear and tear. When installed correctly, it creates a sturdy barrier that can endure the everyday hustle of garage life. Additionally, drywall offers a level of fire resistance, which can be an essential safety feature, particularly if your garage is attached to your home. Installing fire-rated drywall can slow down the spread of flames in the event of a fire, providing you with additional protection. 2. Cost-Effective Solution When compared to other materials like plywood, metal panels, or plaster, drywall is a much more affordable option for garage walls. It offers a great balance between quality and cost, making it accessible to homeowners who want to finish or renovate their garage without breaking the bank. Because drywall is easy to install, it reduces labor costs, and the material itself is inexpensive. London Drywallers specializes in efficient drywall installation, helping you maximize your budget without sacrificing quality. 3. A Smooth, Professional Finish One of the biggest advantages of using drywall in your garage is the smooth and clean finish it provides. Drywall creates a seamless, polished look, unlike the rough appearance of concrete or unfinished wood. It can easily be primed and painted to match the rest of your home, giving your garage a professional and cohesive appearance. With the help of London Drywallers, you can customize your garage walls with a variety of paint finishes or even add texture if desired. Whether you prefer a minimalist design or a bold, colorful space, drywall gives you the flexibility to make your garage look as sophisticated or as simple as you want. 4. Ease of Repair and Maintenance Garages are prone to damage over time, especially if they’re used for storage, home projects, or car repairs. The good news is that drywall is relatively easy to repair. If your garage walls get scratched, dented, or damaged, a professional drywall repair service can fix the issue quickly and efficiently, restoring the walls to their original condition. In contrast, materials like wood paneling or metal sheets may require more extensive repairs or even full replacement. Drywall’s repairability makes it a low-maintenance option that can extend the life of your garage walls. 5. Insulation and Energy Efficiency A properly insulated garage can make a significant difference in your home’s overall energy efficiency. Drywall is compatible with a variety of insulation materials, making it easier to insulate your garage walls to help regulate the temperature. Insulation behind drywall keeps your garage warmer in the winter and cooler in the summer, which is especially important if your garage is attached to your home or used as a living or working space. In London, where winters can be particularly harsh, having a well-insulated garage with drywall walls can reduce your heating costs and provide a more comfortable environment. 6. Customizable Storage Solutions Drywall offers the advantage of being a versatile surface for installing shelving, pegboards, or hooks. These storage solutions can help you maximize the space in your garage and keep it organized. Whether you need to hang tools, bicycles, or seasonal decorations, drywall makes it easy to customize your garage for functionality. London Drywallers can ensure that your drywall is properly reinforced in areas where heavy storage or shelving will be installed, giving you peace of mind that your walls can handle the load. 7. A Clean and Tidy Look Many garages have unfinished, raw walls, which can make the space feel cluttered and unwelcoming. Drywall, when finished and painted, instantly brightens the space, giving it a clean and tidy look. This can be especially appealing if you use your garage for more than just parking your car, such as for hobbies, a home gym, or a workshop. By choosing drywall for your garage walls, you create a more inviting and organized space that’s easy to maintain and keeps everything looking neat. 8. Improved Home Value Finishing your garage with drywall can increase the overall value of your home. Potential buyers often look for finished garages that can serve as additional functional spaces. A professionally drywalled and finished garage adds to the home’s appeal and can give you an edge in the real estate market. A garage with drywall walls also demonstrates that the space is well cared for, and the attention to detail can reflect positively on the entire property. Conclusion: Drywall is the Perfect Choice for Garage Walls When it comes to finishing your garage, drywall offers a range of benefits—from durability and cost-effectiveness to a professional finish and added insulation. London Drywallers provides expert drywall installation services that ensure your garage walls are built to last and look great. If you’re ready to transform your garage into a functional and aesthetically pleasing space, contact London Drywallers today to learn more about how we can help with your drywall needs. Whether you’re renovating or starting from scratch, drywall is the perfect choice for your garage walls!