Understanding Drywall Taping: A Crucial Step in Finishing
Drywall taping is a critical step in the drywall installation process that involves covering the joints and seams between drywall panels to create a smooth and seamless surface. Proper taping ensures that the finished walls or ceilings appear uniform and free of visible imperfections. In this guide, we'll explore what drywall taping involves and why it's essential for achieving professional-quality results.
1. Preparation:
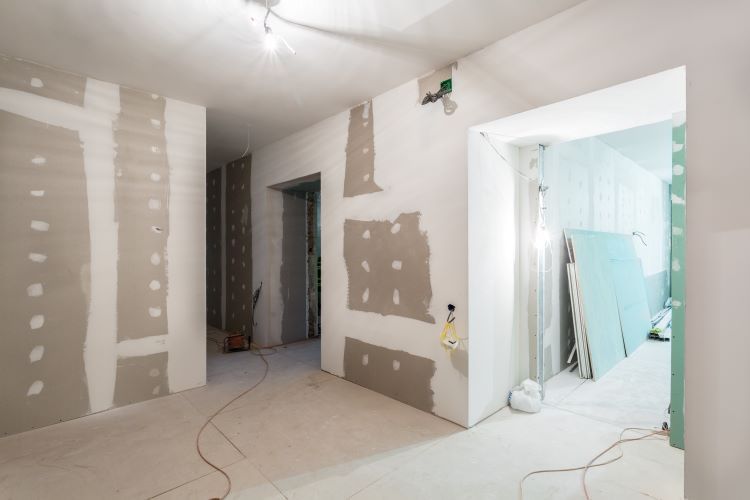
Before beginning the taping process, it's essential to prepare the drywall surfaces properly. This includes ensuring that the drywall panels are installed correctly and securely fastened to the framing. Any gaps between panels should be filled with joint compound, and any protruding screws or nails should be sunk below the surface.
2. Applying Joint Compound:
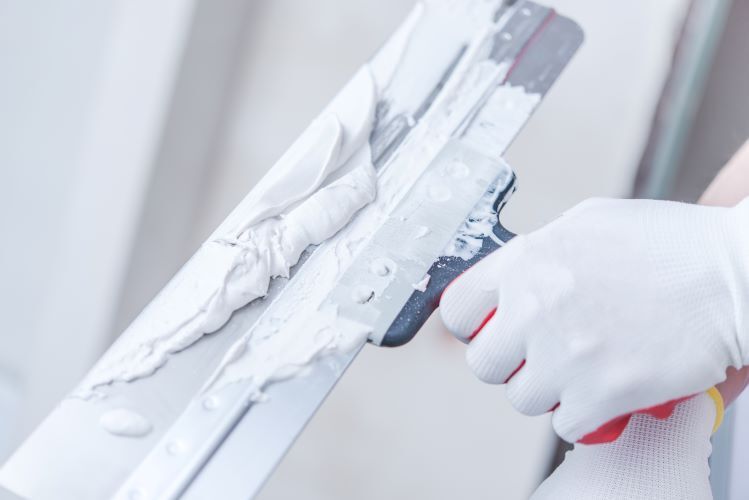
Once the drywall panels are installed and the joints are filled, the next step is to apply joint compound, also known as mud, over the seams and joints. Joint compound is a thick paste-like substance that is spread over the joints using a drywall knife or trowel. The compound helps to fill in gaps and create a smooth transition between panels.
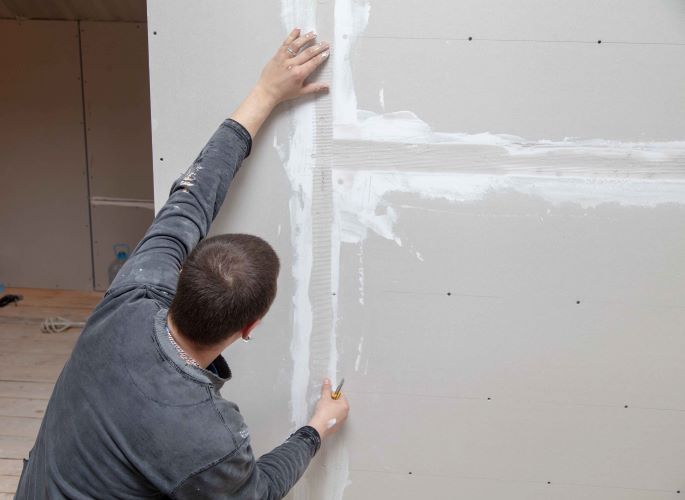
3. Embedding Drywall Tape:
After applying the joint compound, drywall tape is embedded into the compound along the seams and joints. Drywall tape comes in various forms, including paper tape and self-adhesive mesh tape. The tape helps to reinforce the joints and prevent cracking or separation over time.
4. Taping and Feathering:
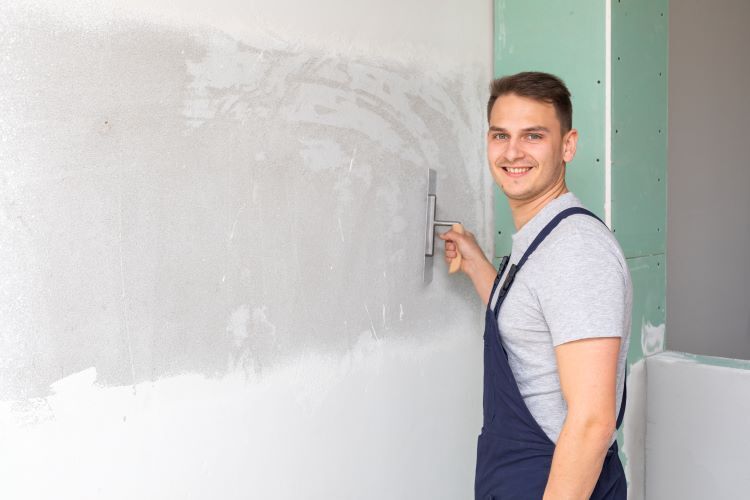
Once the tape is in place, additional layers of joint compound are applied over the tape to cover it completely. This process is known as taping and feathering, where successive layers of compound are applied and smoothed out to create a seamless finish. The compound is feathered out beyond the edges of the tape to blend it into the surrounding drywall surface.
5. Sanding and Finishing:
After the compound has dried, the taping area is sanded smooth to remove any bumps or imperfections. This step helps to achieve a uniform surface texture and prepares the drywall for painting or other finishes. Once sanded, the taping area is inspected for any remaining imperfections, which can be patched and sanded as needed.
6. Priming and Painting:
Once the taping process is complete and the drywall surface is smooth and free of imperfections, it's ready for priming and painting. Priming helps to seal the drywall and create a uniform surface for paint application. After priming, the drywall can be painted with the desired color or finish to complete the project.
Conclusion:
Drywall taping is a crucial step in the drywall installation process that requires skill, precision, and attention to detail. By understanding the steps involved in drywall taping and working with experienced professionals like London Drywallers, you can ensure that your drywall project is completed to the highest standards. With proper taping techniques, you can achieve smooth, seamless walls and ceilings that enhance the beauty and value of your home.